 By Ethan Brooks
Updated November 2026
A Masterbuilt turkey fryer XXL can cook a large bird in a fraction of the time an oven needs, but only if you set it up correctly and respect the risks that come with hot oil. This guide walks you through choosing the right size, preparing your bird, setting up your fryer outdoors, frying step by step, and cleaning up afterward. By the end, you will have a clear plan you can follow on the day you fry.
What the Masterbuilt Turkey Fryer XXL Is Built For
The XXL designation generally refers to Masterbuilt’s largest turkey-fryer class, intended for birds in the upper weight range and for households that want to fry more than one bird or a large batch of sides. Before you buy or plan a fry, confirm the exact model and its listed capacity in the manufacturer’s manual, because the XXL label is used across more than one product line and the specifications differ. For a broader look at the brand’s lineup, see 5 Best Masterbuilt XL Turkey Fryer Models Compared (2026).
Shopping for one? See our guide: 6 Best Masterbuilt Turkey Deep Fryer Options for Holiday Cooking (2026).
Most owners use the fryer for traditional whole-bird frying, but the basket and pot can also handle seafood, fries, and wings when the bird is not in use. Plan on a dedicated outdoor spot every time, since these units are designed for outdoor use only.
Choosing the Right Size Bird and Oil Volume
Bird size and oil level are the two numbers that most often go wrong. Overfilling the pot with oil causes boil-over when the bird goes in. Underfilling leaves the bird partly exposed and cooks it unevenly.
- Weigh your thawed, empty bird. Most manufacturers list a maximum weight for their XXL-class units, commonly in the mid-teens to low-twenties in pounds. Stay within the listed limit.
- Place the bird in the empty pot or basket, then add water until it covers the bird by about one inch. Mark the water line.
- Remove the bird, dry the pot completely, and note the water level. This mark is your maximum oil line.
- Dry the bird and pot again before adding oil. Water and hot oil do not mix.
| Step | Target | Why it matters |
|---|---|---|
| Bird thawing | Fully thawed, about 24 hours per 4 to 5 pounds in the refrigerator | Ice inside the cavity can cause violent oil eruption |
| Water displacement | Bird covered by about 1 inch of water | Sets the safe maximum oil line |
| Oil level | Just below the marked line | Prevents boil-over |
| Frying time | About 3 to 4 minutes per pound, then check internal temperature | Ensures the thickest part reaches safe doneness |
| Internal temperature | 165°F in the thickest part of the breast and thigh | Meets USDA poultry guidance |
Setting Up the Fryer Safely
Location is critical. Set the fryer on a flat, stable, level surface at least 10 feet from the house, garage, deck railings, and overhanging trees. Keep children and pets well away. Never use the fryer under a covered structure, in a garage, or on a wooden deck.
Assembling the Burner and Pot
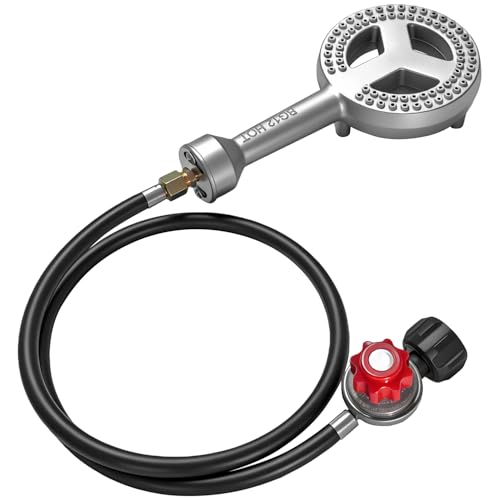
Follow the manufacturer’s assembly diagram exactly. Confirm the burner is seated, the gas connection is tight, and the regulator is attached to the propane tank. Check every connection with a soapy water solution before lighting. Bubbles at a joint mean a leak, so tighten or replace the part before you proceed.
Preparing the Bird
- Remove the giblets and neck from the cavity.
- Pat the bird dry inside and out, since moisture is the biggest enemy of safe frying.
- Inject, rub, or season as your recipe calls for, but avoid heavy sugar-based marinades that can burn at frying temperatures.
- Secure legs and wings close to the body with butcher’s twine or the fryer’s hanger hook, and attach the lifting hook to the bird according to the manual.
Step-by-Step Frying Process
- Measure and mark oil. Add peanut or canola oil to the marked level in the dry pot. Use oils with a high smoke point.
- Heat the oil. Bring the oil to the temperature specified in your recipe, typically around 350°F. Use the built-in thermometer and monitor it throughout.
- Lower the bird slowly. Turn off the burner, then lower the bird into the oil using the hook and hanger. Lower it gradually so the oil does not surge over the edge.
- Restart the burner. Relight the burner and maintain the target temperature, adjusting the flame as needed. Expect the temperature to drop when the bird goes in and recover over time.
- Monitor the cook. Plan on roughly 3 to 4 minutes per pound, but treat that as an estimate. Use a probe thermometer to check the thickest part of the breast and the inner thigh.
- Remove and drain. Turn off the burner, lift the bird slowly, and let it drain over the pot for several minutes before moving it to a pan.
- Rest before carving. Let the bird rest for at least 20 minutes so the juices redistribute.
Recommended gear
- Digital instant-read thermometer: A probe thermometer lets you verify doneness without opening the pot repeatedly. View on Amazon
- Heat-resistant gloves: Useful for handling the hot lifting hook and pot edges. View on Amazon
- Fire extinguisher, Class K or ABC: Keep one within reach at all times for grease fires. View on Amazon
- Turkey fryer pot kit accessories: Replacement hangers and hooks help you keep the frying station organized. View on Amazon
Common Mistakes to Avoid
- Frying a partially frozen bird. Ice and water create steam explosions. Confirm the cavity is fully thawed.
- Skipping the water test. Guessing the oil level is the single most common cause of boil-over.
- Frying indoors or in a garage. Carbon monoxide and fire risks make indoor use unsafe.
- Leaving the fryer unattended. Oil can overheat in minutes. Stay with the unit the whole time.
- Using a damp bird or wet tools. Pat everything dry before the bird touches the oil.
- Ignoring the thermometer. Oil that runs too hot can ignite. Keep it within the recipe range.
Tips for a Better Result
- Brine the bird overnight for juicier meat, then pat it very dry before frying.
- Keep a second container of oil ready in case you need to top off during the cook.
- Use a long-handled timer or phone alarm so you do not lose track of time.
- Plan your timeline around the rest of the holiday meal. Frying is quick, but setup and cleanup take longer than most people expect. Our holiday menu planner resources can help you schedule it.
For broader setup and sizing advice, read Turkey Fryer Pot Kit: Setup Steps, Sizing Tips and Safe Frying Guide and Turkey Deep Fryer Accessories: 8 Essentials for Safe Holiday Frying.
FAQ
What size bird fits a Masterbuilt turkey fryer XXL?
Check the weight limit listed in your model’s manual. Most XXL-class units accept birds in the upper weight range commonly sold for holiday cooking, but the exact maximum varies by model.
How much oil do I need?
Use the water-displacement method described above. Typically this means several gallons of oil for the largest units, but always fill to your own marked line rather than a generic amount.
How long does it take to fry a turkey in this fryer?
A common estimate is about 3 to 4 minutes per pound. Always confirm doneness with a thermometer, targeting 165°F in the thickest parts.
Can I fry a turkey indoors?
No. Outdoor use only, at a safe distance from structures, is the standard safety guidance for turkey fryers.
What oil works best?
Peanut and canola oils are widely used because of their high smoke points. Follow your recipe and manufacturer guidance on oil choice.
Can I cook other foods in the fryer?
Many owners use it for seafood, fries, and wings. Use the same safety rules, and never leave the unit unattended.
How do I dispose of used oil?
Let the oil cool completely, then strain and store it in a sealed container. Check local rules before disposal, as many areas do not allow pouring oil down drains.
Should I consult a professional about setup?
If you are unsure about propane connections or gas leaks, consult a qualified professional or your propane supplier before frying.
Conclusion
A Masterbuilt turkey fryer XXL rewards careful preparation. Confirm your bird’s weight, use the water-displacement method to set your oil level, and fry outdoors on a stable surface away from structures. Keep a thermometer and fire extinguisher nearby, and never leave the unit unattended.
Related reading
- Masterbuilt Butterball Turkey Fryer XXL: Setup, Steps and Safety Guide
- Masterbuilt Butterball Turkey Fryer XL: Setup, Frying Steps and Safety Tips
- Butterball Indoor Turkey Fryer XXL: Setup, Frying Steps and Safety Tips
Ready to choose one?
About Ethan Brooks
Ethan Brooks is part of our editorial team and reviews and edits our holiday cooking & baking guides, checking product details against manufacturer specifications and owner feedback.