 By Ethan Brooks
Updated November 2026
A stainless steel turkey fryer gives you a sturdy, easy-to-clean pot for frying a whole bird in about 3 to 4 minutes per pound, provided you set it up on a level outdoor surface, measure your oil correctly and control the heat. This guide walks you through choosing the right model, preparing your turkey, running a safe frying session and cleaning up afterward. Read the manufacturer’s manual before your first use, because specifications and recommended frying times vary between models.
What Makes a Stainless Steel Turkey Fryer Different
Most turkey fryers are built around a large cooking pot, a burner stand and a basket or hook system for lowering the bird. The pot material matters more than many buyers expect. Stainless steel resists rust, does not hold residue the way some older aluminum or painted steel pots do, and handles repeated cleaning well. Stainless steel also heats more slowly than aluminum, so it takes longer to bring oil to temperature and recovers more gradually after you add a cold bird. Manufacturers often pair stainless pots with heavier-gauge burner stands for stability.
Shopping for one? See our guide: 7 Best Roasting Pans with Rack Stainless Steel for Turkey and Roasts.
When you compare models, look at the pot’s wall thickness and whether the body is a single seamless piece or welded. Thicker walls hold heat more evenly, which helps when the oil temperature drops after you lower the turkey. A stainless steel turkey fryer kit usually includes the pot, a perforated basket, a lifting hook, a thermometer and a propane regulator and hose, but check the inclusions list before you buy.
Choosing the Right Size and Capacity
Capacity is the first decision. Most home fryers are rated between 10 and 30 quarts. A common rule is that the pot should be large enough to submerge the turkey fully in oil while leaving at least 3 to 4 inches of clearance between the oil surface and the rim. That clearance is what prevents oil from boiling over when the bird goes in.
Match the Pot to Your Bird
Use the table below as a starting point. Always confirm the fit with a water test before frying (see the setup steps below).
| Turkey Weight | Typical Pot Size | Approximate Oil Needed |
|---|---|---|
| Up to 12 lb | 10 to 12 quarts | 3 to 4 gallons |
| 12 to 16 lb | 18 to 22 quarts | 4 to 5 gallons |
| 16 to 22 lb | 26 to 30 quarts | 5 to 7 gallons |
Consider Burner Output
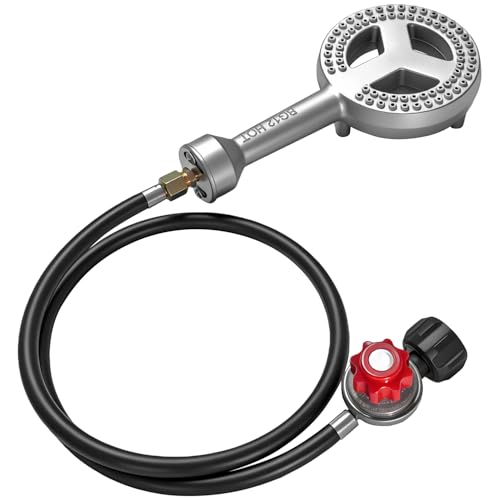
Propane burners are rated in BTUs. Many home units fall in the range of roughly 50,000 to 60,000 BTU, though higher-output burners exist. More BTUs help you reach frying temperature faster and recover quickly after adding the bird, but they also raise the risk of overheating if you leave the burner unattended. Choose a burner that matches your pot size and read the manufacturer’s guidance on maximum oil volume.
Step-by-Step Setup
Setup determines most of the safety outcome. Take your time here.
Step 1: Pick the Location
Set the fryer on a flat, level, non-flammable surface outdoors, at least 10 feet from your house, garage, deck railings, trees and any other structure. Keep it away from wind and overhangs. Never use a turkey fryer on a wooden deck, in a garage or under a carport. Keep children and pets well back.
Step 2: Do the Water Test
- Place the empty pot on the burner stand in its final position.
- Put the turkey in the basket (unwrapped, thawed, patted dry) and lower it into the pot.
- Add cold water until the turkey is fully covered by about one inch.
- Remove the turkey and mark the water line with a marker or note the level on the pot.
- Dump the water, dry the pot and the turkey thoroughly. Any water left in the pot when oil goes in can cause a dangerous boil-over.
Step 3: Measure and Add Oil
Use the water level from the water test to determine how much oil you need. Most manufacturers recommend a neutral, high smoke-point oil such as peanut, canola or refined safflower. Avoid extra-virgin olive oil, which has a low smoke point and tends to break down. Fill to the mark, not above it, once the turkey is accounted for.
Step 4: Preheat to the Right Temperature
Set a clip-on or probe thermometer on the pot and heat the oil to about 350 degrees Fahrenheit before lowering the bird. Turn off the burner, then lower the turkey slowly and steadily. Expect the temperature to drop noticeably; restart the burner and bring the oil back to roughly 350 degrees. Maintain temperature in the 325 to 350 range for most of the cook.
The Frying Process
Once the bird is in, frying generally takes 3 to 4 minutes per pound, but the only reliable finish line is an internal temperature of 165 degrees Fahrenheit in the thickest part of the breast and the thigh. Use an instant-read thermometer to check several spots.
Lowering the Bird
- Turn the burner off before lowering the turkey.
- Lower it slowly with the hook, keeping your face and body away from the pot.
- Restart the burner once the turkey is fully submerged and the oil is stable.
Monitoring the Cook
Stay with the fryer the entire time. Check the oil temperature every few minutes and adjust the flame to keep it in range. If you see smoke or the oil begins to foam heavily, lower the heat immediately. Never leave a lit burner unattended.
Removing and Resting
Turn off the burner, then lift the turkey out slowly, letting excess oil drain. Place it on a rack or tray lined with paper towels and rest it for 15 to 20 minutes before carving. Resting lets juices redistribute and makes carving cleaner.
Safety Checklist
- Fryer placed outdoors on a level surface, well away from structures.
- Turkey fully thawed and patted dry, with all cavities emptied of ice.
- Water test completed and pot dried before adding oil.
- Fire extinguisher (rated for grease and oil fires) within reach.
- Thermometer clipped to the pot and checked throughout.
- Adult supervision at all times; children and pets kept back.
Cleaning and Storing Your Stainless Steel Turkey Fryer
Let the oil cool completely before draining. Strain it through a fine mesh filter or cheesecloth to remove food particles, then store it in a sealed container. Many cooks reuse frying oil once or twice if it has not overheated or taken on strong flavors. Wash the stainless pot with warm soapy water and a non-abrasive pad. For baked-on residue, a short soak in warm water with a degreaser usually works. Dry the pot fully before storing it, and keep the propane tank disconnected and stored outdoors.
Common Mistakes to Avoid
- Skipping the water test, which is the most common cause of oil overflow.
- Frying a partially frozen or wet turkey, which causes violent oil spattering.
- Overfilling the pot with oil.
- Using a cooking oil with a low smoke point.
- Leaving the burner unattended, even for a moment.
- Setting up in a garage, carport or on a wooden deck.
Tips for a Better Result
- Inject or brine the turkey in advance for more flavor, and dry it well before frying.
- Keep oil temperature steady; big swings give uneven browning and greasier skin.
- Plan your timeline so the bird rests while you finish side dishes.
- Read our guide on Turkey Fryer Deep Fryer Guide: Safe Setup, Oil Use and Frying Steps for more detail on oil handling and cleanup.
Related Reading
If you are still deciding on equipment, start with Stainless Steel Turkey Fryer Kit: How to Choose, Set Up and Fry Safely for a closer look at kit contents. If you prefer a different cooking method, compare options in Turkey Fryer No Oil: 6 Best Oil-Less Models Compared (2026). For sizing questions, Turkey Fryer 30 Quart: Setup, Sizing and Safe Frying Steps covers large-pot planning in detail. Flavor prep is covered in Turkey Fryer Dry Rub: 7 Best Options for Holiday Frying (2026), and safety add-ons are listed in Turkey Deep Fryer Accessories: 8 Essentials for Safe Holiday Frying.
Recommended Gear
- Digital instant-read thermometer: Lets you check the breast and thigh quickly so you know the bird reached 165 degrees without guessing. View on Amazon
- Fine mesh oil filter or strainer: Removes crumbs and particles so the oil stays clearer for reuse. View on Amazon
- Class K fire extinguisher: Rated for cooking oil and grease fires, which water-based extinguishers cannot safely handle. View on Amazon
FAQ
Is a stainless steel turkey fryer better than an aluminum one?
Stainless steel resists rust and is easier to clean, while aluminum heats faster. Neither is automatically better. Choose based on how you plan to clean and store the pot and how quickly you need to recover oil temperature.
How much oil do I need for a 14-pound turkey?
Most 14-pound birds need roughly 4 to 5 gallons of oil in a pot of about 18 to 22 quarts. Always confirm the exact amount with a water test using your own turkey and pot.
What temperature should the oil be?
Aim for about 350 degrees Fahrenheit before lowering the bird, and hold the oil between roughly 325 and 350 degrees during frying. Temperature will drop when the turkey goes in, so monitor it closely.
How long does a turkey take to fry?
Plan on about 3 to 4 minutes per pound, but always check for an internal temperature of 165 degrees Fahrenheit in the thickest parts of the breast and thigh before removing the bird.
Can I reuse the frying oil?
Often yes, if you strain it well after it cools and it has not overheated, smoked heavily or picked up strong odors. Store it sealed and discard it if it looks dark, smells rancid or foams excessively.
Can I use a stainless steel turkey fryer indoors?
No. Turkey fryers should only be used outdoors on a level, non-flammable surface away from structures. Indoor use creates serious fire and carbon monoxide risks.
What if I see oil bubbling over when I lower the turkey?
Turn off the burner immediately and let the oil settle. This usually means the bird was too wet, the pot was overfilled or the water test was skipped. Do not restart until the oil is calm and you have corrected the cause.
Should I consult a professional before frying?
If you have questions about fire safety, propane handling or insurance coverage for outdoor cooking, consult your local fire department or a qualified professional.
Conclusion
A stainless steel turkey fryer can produce a juicy, golden bird in a fraction of the time an oven takes, as long as you respect the setup and safety steps. Match the pot to your turkey, complete the water test, monitor oil temperature and verify doneness with a thermometer. With careful preparation, your holiday frying session can be both efficient and safe.
Related reading
Ready to choose one?
About Ethan Brooks
Ethan Brooks is part of our editorial team and reviews and edits our holiday cooking & baking guides, checking product details against manufacturer specifications and owner feedback.