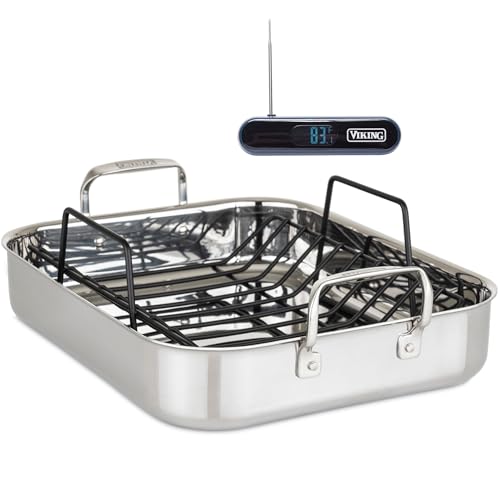
 By Emily Parker
Updated November 2026
A roasting pan made in USA can be a solid investment for holiday cooks, but “made in USA” on a label does not tell you everything about how the pan will perform. This guide walks you through how to confirm where a pan was made, which materials and construction details matter most for turkey and roasts, and how to pick a size and style that fits your oven and your meal. By the end, you will have a checklist you can use in a store or on a product page.
What “Made in USA” Actually Means on a Roasting Pan
In the United States, a product labeled “Made in USA” is generally expected to have been substantially manufactured domestically, but the exact rules can vary depending on the claim and the enforcing agency. Many cookware brands also combine parts from different countries, such as a stainless body from one source and handles from another. Treat the label as a starting point and look for specifics on the product page or packaging.
Shopping for one? See our guide: 6 Best All Clad Roasting Pans with Rack for Turkey and Roasts (2026).
Check the Label and Product Description
Look for the origin statement on the packaging, the underside of the pan, or the manufacturer’s spec sheet. Some brands state whether the body, handles and lids are made domestically, while others only say the final assembly happened in the US. If a listing is vague, check the brand’s official website for more detail before you buy.
Watch for Vague Wording
Phrases like “crafted in America” or “American-inspired” do not necessarily mean the pan was made in the United States. Pay attention to the exact words used. A clear origin statement is more useful than marketing language.
Step 1: Choose the Right Material
Most roasting pans are made from stainless steel, aluminum, enameled steel or carbon steel. Each has tradeoffs for holiday roasting, and your choice should depend on how you plan to cook and clean up.
Stainless Steel
Stainless steel is the most common choice for roasting pans because it resists staining, holds up to repeated use and can go from oven to stovetop when the base is suitable. Look for a heavier gauge if you plan to deglaze pan drippings on the range. Thin stainless can warp under high heat.
Aluminum
Aluminum heats quickly and evenly, but thin versions can dent and may react with acidic ingredients. Heavy-gauge aluminum with a reinforced rim performs better for large birds. Anodized aluminum is less reactive than plain aluminum.
Enameled and Carbon Steel
Enameled pans are easy to clean and look good on the table, though the enamel can chip if handled roughly. Carbon steel builds up a seasoned surface over time and is less common for traditional roasting pans but appears in some heavy-duty models.
Step 2: Check Gauge, Weight and Construction
Thickness matters more than most shoppers expect. A pan that flexes when you lift it will often warp, which can tip drippings and cause uneven browning.
- Lift the empty pan and note whether it feels sturdy or flimsy.
- Press the base and sides. There should be little give.
- Look at the rim. A rolled or reinforced edge resists bending when you lift a heavy bird.
- Check the handles. They should be riveted or welded securely, not just stamped on.
- Confirm the pan fits your oven racks with room for air circulation.
Step 3: Pick the Right Size
Size is where many holiday cooks make their first mistake. A pan that is too small crowds the bird and steams the skin. A pan that is too large can scorch drippings and wastes oven space. Measure your oven interior, then compare the pan’s outside dimensions to the turkey or roast you plan to cook.
| Roast Type | Typical Pan Length (approx.) | Notes |
|---|---|---|
| Chicken or small roast | 13 to 15 inches | Shallow sides are fine for crisp skin. |
| Turkey, 12 to 16 lb | 16 to 17 inches | Leave a few inches clear on each side. |
| Turkey, 18 to 22 lb | 17 to 19 inches | Check that the pan clears your oven door when it is on the rack. |
Manufacturers usually list interior and exterior dimensions separately. Use the interior measurement to judge bird size and the exterior measurement to confirm oven fit.
Step 4: Decide on a Rack, Lid or Both
A rack lifts the bird out of its drippings so the underside does not steam. A lid traps moisture and helps keep meat juicy, but it also slows browning. Many cooks use a rack without a lid for crisp skin, then tent loosely with foil during resting. If you want both options, look for a pan that sells the rack and lid separately.
Rack Tips
- Choose a rack that sits at least half an inch above the pan floor.
- Make sure the rack is stainless and sturdy enough for the weight of your roast.
- Check that the rack handles are not too close to the oven walls.
Step 5: Confirm Oven and Cooktop Compatibility
Check the manufacturer’s stated maximum oven temperature. Most stainless and enameled roasting pans are rated for typical holiday roasting temperatures, but some coatings have lower limits. If you plan to deglaze on the stove, confirm the pan is rated for stovetop use and that the base is flat enough to sit evenly on your burner. Never leave an empty pan on a hot burner, and let the pan cool before washing it to avoid warping.
Step 6: Plan Your Holiday Timeline
Pick your pan a few weeks before the holiday so you can test fit it in your oven and practice lifting it when empty. On cooking day, preheat the oven fully, position the rack so the pan sits centered, and allow extra time for handling a hot, heavy pan. Plan to rest the bird for at least 20 to 30 minutes before carving so juices redistribute.
Tips and Common Mistakes
- Buying by label alone. Confirm the origin statement and read the spec sheet before you decide.
- Ignoring gauge. Thin metal warps under heavy loads.
- Choosing a pan that does not fit your oven. Measure before you buy, especially for large birds.
- Skipping a rack. Without one, the bottom of the bird can steam and soften.
- Pouring cold liquid into a hot pan. Thermal shock can warp metal. Let the pan cool a bit first.
- Forgetting the lift. Use two oven mitts and a sturdy platter for transfer.
Recommended gear
A few supporting tools make a bigger difference than most cooks expect when you are working with a heavy, hot roasting pan.
- A reliable instant-read thermometer helps you confirm doneness without guessing. View on Amazon
- Heavy-duty silicone oven mitts give you a secure grip on a hot, loaded pan. View on Amazon
- A stainless roasting rack keeps the bird off the pan floor for crisp skin. View on Amazon
FAQ
Does “made in USA” mean the whole pan was made in America?
Not always. Some brands assemble domestically using parts from other countries. Check the product page or spec sheet for the exact origin of the body, handles and lid.
What is the best material for a roasting pan?
Heavy-gauge stainless steel is the most versatile choice for holiday roasting because it resists staining and handles stovetop deglazing well. Aluminum and enameled steel are also common and work well with the right care.
How big a roasting pan do I need for a 20 lb turkey?
Most cooks look for a pan around 17 to 19 inches long for a bird that size, with a few inches of clearance on each side. Always measure your oven first.
Should I use a lid when roasting a turkey?
A lid keeps meat moist but slows browning. Many cooks roast uncovered for crisp skin and tent with foil as needed.
Can I put a roasting pan on the stovetop?
Only if the manufacturer rates the pan for stovetop use. Check the base construction and cookware guidance before placing it over a burner.
How do I keep a stainless roasting pan from warping?
Avoid sudden temperature changes, let the pan cool before washing, and choose a heavier gauge from the start.
How should I clean a roasting pan after holiday cooking?
Soak the pan in warm, soapy water while it cools, then use a non-abrasive scrubber. Follow the manufacturer’s care instructions, especially for enameled or coated surfaces. For questions about food safety when handling large birds, consult your local extension service or a food safety professional.
Conclusion
A roasting pan made in USA can serve you well for many holidays, but the label is only the first thing to check. Confirm the origin details, choose a sturdy material and gauge, measure for size and oven fit, and decide whether you need a rack or lid. With those steps done, you can buy with confidence and spend your time on the meal itself.
Related reading
- Why Is My Nonstick Roasting Pan with Rack Sticking? 5 Causes and Fixes
- What to Cook in a Roasting Pan: 8 Holiday Dishes That Work Well
- What Size Roasting Pan for a 20 Lb Turkey? 5 Best Picks Compared
- What Is a Shallow Roasting Pan? Uses, Size and How to Choose One
- What Is a Roasting Pan Used For? Uses, Tips and Holiday Examples
- What Does Roasting Pan Look Like? A Quick Visual Guide for Holiday Cooks
Ready to choose one?
About Emily Parker
Emily Parker is part of our editorial team and reviews and edits our holiday cooking & baking guides, checking product details against manufacturer specifications and owner feedback.