By Emily Parker
Updated November 2026
Cooking turkey in aluminum roasting pan setups is one of the most common ways to handle a holiday bird, and it works well when you know how the pan behaves. This guide walks you through preparing the bird, setting up the pan, roasting to a safe internal temperature and resting the turkey so the meat stays moist. You will finish with a golden, fully cooked turkey and a pan that is easy to deglaze for gravy.
Prepare the Turkey and Pan Before Roasting
Thaw the turkey completely in the refrigerator, allowing roughly 24 hours per 4 to 5 pounds. Remove the giblets and neck, pat the skin dry and let the bird sit uncovered on the counter for about 30 minutes so the surface roasts instead of steams. Aluminum conducts heat quickly, so a thin, floppy pan can scorch drippings and warp under a heavy bird. Choose a heavy-gauge pan sized so the turkey sits with at least an inch of clearance on all sides.
Set Up the Rack and Seasoning
Place a flat rack in the pan so the bird sits above the drippings. This keeps the bottom skin from sitting in liquid and helps hot air circulate. Rub the skin with softened butter or oil, then season generously with salt, pepper and any herbs you like. Add about 1 cup of broth or water to the bottom of the pan to prevent the drippings from burning and to create a base for gravy.
Roast to a Safe Internal Temperature
Preheat the oven to 325°F. Roast the turkey breast-side up and baste every 30 to 45 minutes, adding more broth to the pan if it looks dry. Cover loosely with foil for the first half of cooking if the skin browns too fast, then remove the foil for the final stretch. A 12- to 14-pound bird typically needs about 3 to 3¼ hours, but time varies with the oven and the bird, so rely on a thermometer.
Insert an instant-read thermometer into the thickest part of the thigh without touching bone. The turkey is done at 165°F in the thigh and 160°F in the breast, which is the USDA safe minimum. If you have questions about food safety or handling a large bird, consult a food safety professional or your local extension office.
Rest and Carve
Move the turkey to a cutting board and tent it loosely with foil for 30 to 45 minutes. Resting lets the juices redistribute, so the slices stay moist. While it rests, pour the pan drippings into a fat separator and start your gravy from the defatted liquid.
Checklist for Roasting Turkey in an Aluminum Pan
- Thawed turkey, patted dry and at room temperature for about 30 minutes
- Heavy-gauge aluminum roasting pan with a flat rack
- Softened butter or oil, salt, pepper and herbs
- About 1 cup of broth or water for the pan
- Instant-read thermometer
- Foil for tenting and loose covering
- Fat separator and a sturdy carving board
Roasting Timeline at a Glance
| Stage | Oven Setting | What to Do |
|---|---|---|
| Prep | Off | Dry skin, season, set up rack |
| Early roast | 325°F | Roast breast-side up, foil loosely if needed |
| Middle roast | 325°F | Baste every 30 to 45 minutes |
| Final stretch | 325°F | Remove foil, check thigh temperature |
| Rest | Off | Tent loosely for 30 to 45 minutes |
Common Mistakes and Tips
- Skipping the thermometer and guessing doneness, which often leads to dry breast meat.
- Letting the pan go dry, which scorches drippings and makes gravy bitter.
- Opening the oven door too often, which drops the temperature and extends cooking time.
- Carving immediately after roasting, which lets juices run onto the board.
- Using a thin pan that warps when hot; a sturdier pan handles heavy birds more evenly.
Recommended Gear
- Instant-read digital thermometer: Gives a fast, accurate reading in the thigh so you know when the bird is safe to carve. View on Amazon
- Heavy-duty aluminum roasting pan with rack: Keeps the bird elevated and gives the drippings room to collect for gravy. View on Amazon
- Fat separator: Lets you pour off the fat and keep the flavorful juices for gravy. View on Amazon
If you are still choosing a pan, 5 Best Aluminum Turkey Roasting Pans for Holiday Cooking (2026) compares several options, and How to Choose a Roasting Pan for Turkey: Size, Material and Rack explains what to look for in size and rack design.
FAQ
Should I cover the turkey when cooking it in an aluminum roasting pan?
Cover it loosely with foil for the first half of roasting to protect the skin from over-browning. Remove the foil during the final stretch so the skin can crisp.
Can I cook a turkey in a disposable aluminum pan?
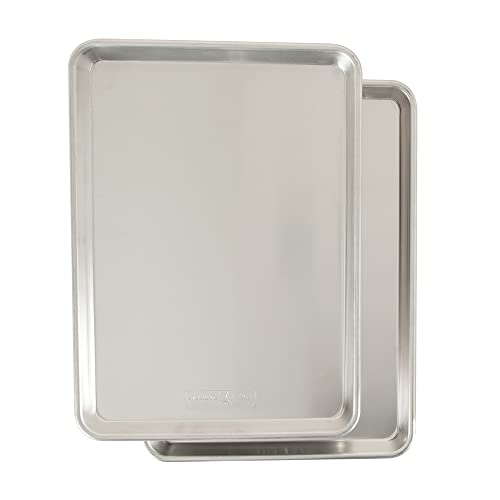
Yes, but disposable pans are thinner and can bend under a heavy bird. Place it on a sturdy baking sheet for support and use two pans for extra stability. For options, see 6 Best Disposable Turkey Roasting Pans for Holiday Cooking (2026).
How do I know when the turkey is done?
Check that the thickest part of the thigh reads 165°F and the breast reads 160°F on an instant-read thermometer. Let it rest before carving.
Conclusion
Cooking turkey in aluminum roasting pan setups gives you reliable results when you prep the bird, use a rack, baste regularly and rely on a thermometer. Rest the turkey before carving so the meat stays juicy. Use the pan drippings as the base for gravy, and your holiday table will have a bird worth the effort.
Related reading
- 7 Best Heavy Duty Aluminum Roasting Pans for Holiday Cooking
- 6 Best Vintage Aluminum Roasting Pan Picks for Holiday Cooking
- Turkey in a Roasting Pan: A Step-by-Step Guide for Holiday Cooks
Ready to choose one?
About Emily Parker
Emily Parker is part of our editorial team and reviews and edits our holiday cooking & baking guides, checking product details against manufacturer specifications and owner feedback.